Creating an interactive interface to select a country and city is a staple in many applications and websites. In this article, we will explore 5 innovative ways to develop this type of project using Vite. We will discuss using different tools such as the Choices.js library and Select2, as well as how to implement the project without external libraries or using a REST API and local JSON files. This article aims to help you choose the method that best suits your project needs.

Create an interactive interface project to select the country and city without using any external library
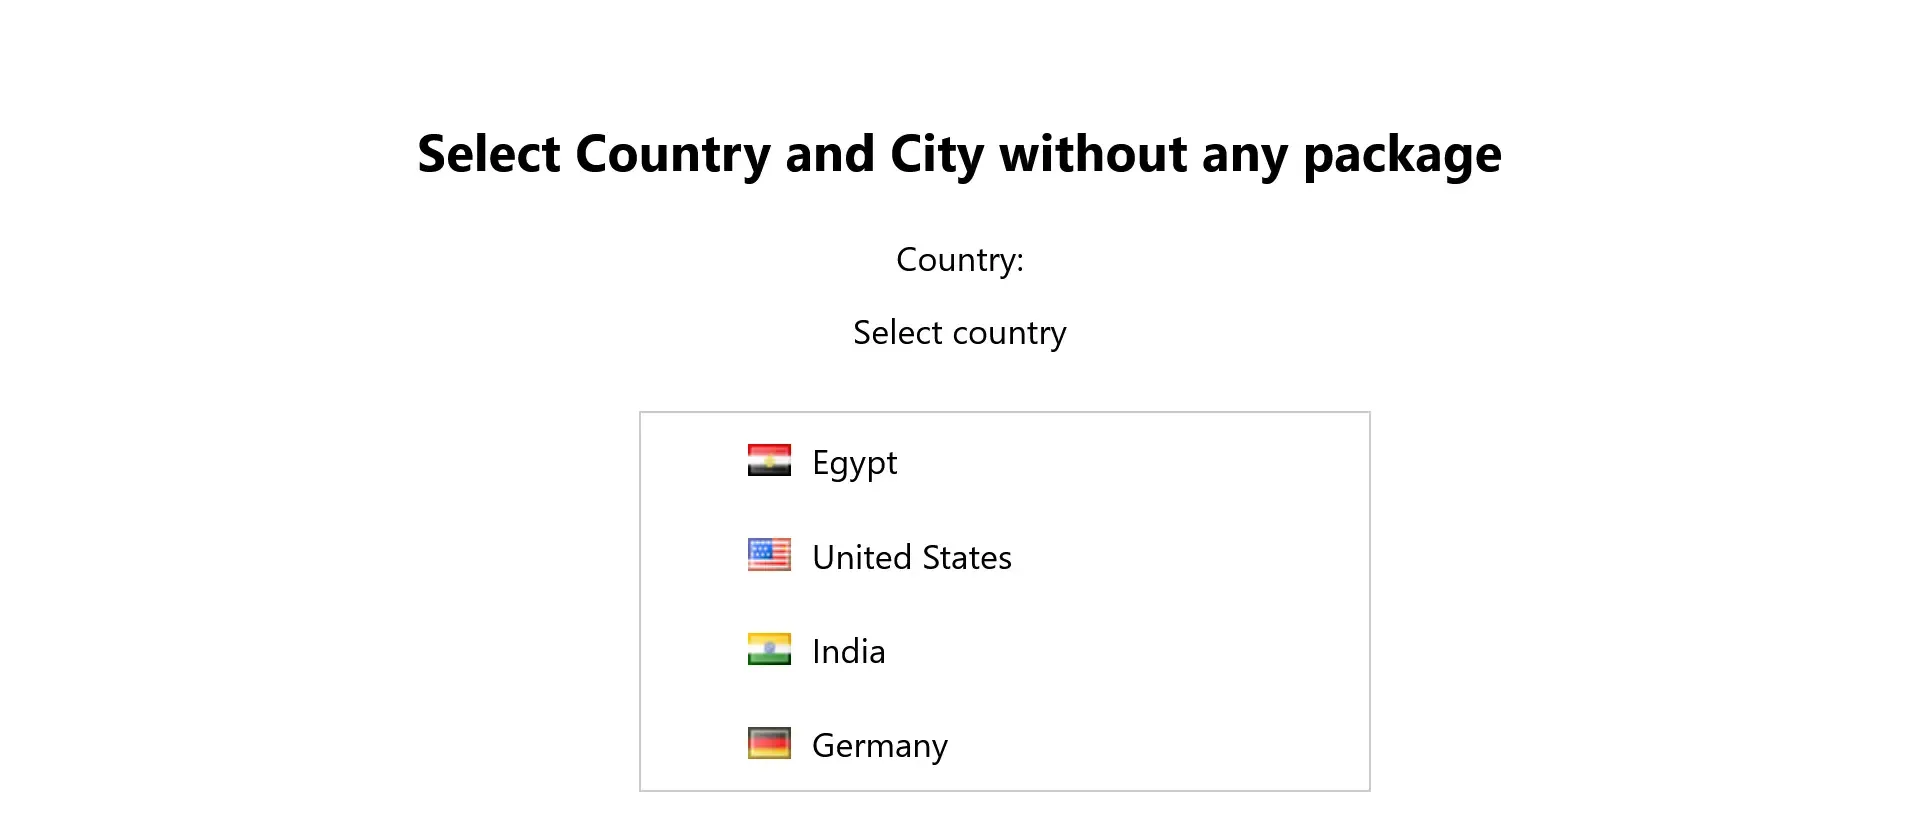
In this example, we will learn how to create a simple project using Vite that allows the user to select a country from a list of country flags, and after selecting the country, another list is activated to select its city. This project is built using HTML, CSS, and JavaScript. Without using any external library.
Basic Requirements
Before starting, make sure you have the following requirements:
- Basic knowledge of HTML, CSS, and JavaScript.
- Node.js installed on your device.
- npm package manager.
1. Create a new Vite project
To start the project, create a Vite application using the following command:
npm create vite@latest vite-country-city-app --template vanilla
cd vite-country-city-app
npm install
This will create a new project with a basic structure ready to go.
2. Design the basic HTML interface
We need to create a simple interface with a list to select the country and another list to select the city. We will modify the index.html file to look like this:
<!DOCTYPE html>
<html lang="en">
<head>
  <meta charset="UTF-8">
  <meta name="viewport" content="width=device-width, initial-scale=1.0">
  <title>Select Country and City</title>
  <link rel="stylesheet" href="/src/style.css">
</head>
<body>
  <div id="app">
    <h1>Select Country and City</h1>

    <label for="country">Country:</label>
    <div class="custom-select" id="country-select">
      <div class="selected">Select country</div>
      <ul class="options"></ul>
    </div>

    <label for="city">City:</label>
    <select id="city" disabled>
      <option value="" disabled selected>Select City</option>
    </select>
  </div>
  <script type="module" src="/src/main.js"></script>
</body>
</html>
3. CSS Design Code
In the next step, we will edit the style.css file in the src folder of the project. This file contains the code needed to add some aesthetic touches to the page.
:root {
  font-family: Inter, system-ui, Avenir, Helvetica, Arial, sans-serif;
  line-height: 1.5;
  font-weight: 400;

  font-synthesis: none;
  text-rendering: optimizeLegibility;
  -webkit-font-smoothing: antialiased;
  -moz-osx-font-smoothing: grayscale;
}

body {
  margin: 0;
  min-width: 320px;
  min-height: 100vh;
  text-align: center;
}

#app {
  max-width: 1280px;
  margin: 0 auto;
  padding: 2rem;
  text-align: center;
  display: flex;
  flex-direction: column;
  place-items: center;
  justify-content: center;
}

.custom-select,
select {
  position: relative;
  width: 300px;
  margin-bottom: 20px;
}

.custom-select .selected,
select {
  padding: 10px;
  cursor: pointer;
}

.custom-select .options {
  position: absolute;
  top: 100%;
  left: 0;
  width: 100%;
  background-color: #fff;
  border: 1px solid #ccc;
  max-height: 200px;
  overflow-y: auto;
  display: none;
  z-index: 1000;
}

.custom-select .options li {
  padding: 10px;
  cursor: pointer;
  display: flex;
  align-items: center;
  gap: 10px;
}

.custom-select .options li img {
  width: 20px;
  height: 15px;
}
4. Write the code to run the project
In the next step, we will add a main.js file in the src folder of the project. This file contains the code needed to populate the lists with data and handle interactions.
Country and City Data First, we will create an object that contains the country and city data, as well as the country flags:
// Sample data for countries and cities
const countryCityData = {
  EG: { name: "Egypt", flag: "eg", cities: ["Cairo", "Giza", "Alexandria"] },
  US: { name: "United States", flag: "us", cities: ["New York", "Los Angeles", "Chicago"] },
  IN: { name: "India", flag: "in", cities: ["Delhi", "Mumbai", "Bangalore"] },
  DE: { name: "Germany", flag: "de", cities: ["Berlin", "Munich", "Frankfurt"] },
};
Filling in the list of countries We create the country options dynamically within the custom list using the data above:
// DOM Elements
const countrySelect = document.getElementById("country-select");
const selected = countrySelect.querySelector(".selected");
const options = countrySelect.querySelector(".options");
const citySelect = document.getElementById("city");

// Fill Country List
Object.entries(countryCityData).forEach(([code, { name, flag }]) => {
  const li = document.createElement("li");
  li.dataset.value = code;
  li.innerHTML = `<img src="flags/${flag}.png" /> ${name}`;
  options.appendChild(li);
});
Interacting with the custom menu We add events to interact with the menus:
// Show Options when clicked on list
selected.addEventListener("click", () => {
  options.style.display = options.style.display === "block" ? "none" : "block";
});

// Update City Select Box When Select Country
options.addEventListener("click", (event) => {
  const target = event.target.closest("li");
  if (!target) return;

  const selectedCountry = target.dataset.value;
  selected.textContent = target.textContent;
  options.style.display = "none";

  // Fill Cities List
  const cities = countryCityData[selectedCountry]?.cities || [];
  citySelect.disabled = cities.length === 0;
  citySelect.innerHTML = `<option value="" disabled selected>Select City</option>`;
  cities.forEach((city) => {
    const option = document.createElement("option");
    option.value = city;
    option.textContent = city;
    citySelect.appendChild(option);
  });
});
5. Run the project
After you finish writing the code, you can run the project using the following commands:
npm run dev
- The project will run in the browser on the local link provided by Vite.
- Open the following link
http://localhost:5173/in the browser and you will find the following.
Create a Country and City Selection Project Using the Choices.js Library
In this example, we will redesign the Country and City Selection Project using an alternative approach that relies on ready-made libraries, CSS, and JavaScript to provide a more professional and easy-to-develop experience. We will use a library like Choices.js to create advanced selection lists.
Prerequisites
Before you begin, make sure you have the following:
- Basic knowledge of HTML, CSS, and JavaScript.
- Node.js installed on your machine.
- Choices.js library installed.
1. Set up a Vite Project
To start the project, create a new project using Vite:
npm create vite@latest vite-country-city-choices --template vanilla
cd vite-country-city-alt
npm install
Next, install the Choices.js library:
npm install choices.js
2. Design the basic HTML interface
We update the index.html file to include the necessary fields to select the country and city:
<!DOCTYPE html>
<html lang="en">
<head>
  <meta charset="UTF-8">
  <meta name="viewport" content="width=device-width, initial-scale=1.0">
  <title>Select Country and City</title>
  <link rel="stylesheet" href="/src/style.css" />
</head>
<body>
  <div id="app">
    <h2>Select Country and City</h2>

    <label for="country">Country:</label>
    <select id="country"></select>

    <label for="city">City:</label>
    <select id="city" disabled></select>
  </div>

  <script type="module" src="/src/main.js"></script>
</body>
</html>
3. CSS Design Code
In the next step, we will edit the style.css file in the src folder of the project. This file contains the code needed to add some aesthetic touches to the page.
:root {
  font-family: Inter, system-ui, Avenir, Helvetica, Arial, sans-serif;
  line-height: 1.5;
  font-weight: 400;
  font-synthesis: none;
  text-rendering: optimizeLegibility;
  -webkit-font-smoothing: antialiased;
  -moz-osx-font-smoothing: grayscale;
}

body {
  margin: 0;
  min-width: 320px;
  min-height: 100vh;
  text-align: center;
}

#app {
  max-width: 1280px;
  margin: 0 auto;
  padding: 2rem;
}

.flag-icon {
  width: 20px;
  height: 15px;
  margin-right: 10px;
  vertical-align: middle;
}
4. Writing the code
We write the code needed to fill the lists using the Choices.js library. The code is added to the main.js file in the src folder.
Defining the data for countries and cities
//Data for countries and cities
const countryCityData = {
  EG: { name: "Egypt", flag: "eg", cities: ["Cairo", "Giza", "Alexandria"] },
  US: { name: "United States", flag: "us", cities: ["New York", "Los Angeles", "Chicago"] },
  IN: { name: "India", flag: "in", cities: ["Delhi", "Mumbai", "Bangalore"] },
  DE: { name: "Germany", flag: "de", cities: ["Berlin", "Munich", "Frankfurt"] },
};
Configure Choices.js Library
import Choices from "choices.js";
import "choices.js/public/assets/styles/choices.min.css"

// DOM Elements
const countrySelect = document.getElementById("country");
const citySelect = document.getElementById("city");

// Create country options
const countryChoices = new Choices(countrySelect, {
  allowHTML: true, // Allow HTML to be displayed inside options
  callbackOnCreateTemplates: function () {
    return {
      item: (classNames, data) => {
        // Check for flag
        const flagIcon = data.customProperties?.flag
          ? `<img class="flag-icon" src="flags/${data.customProperties.flag}.png" alt="${data.label}" />`
          : ' '; // Make it empty if the image is not present

        // Create the element
        const container = document.createElement('div');
        container.className = `${classNames.item} ${data.highlighted ? classNames.highlightedState : ''}`;
        container.setAttribute('data-item', '');
        container.setAttribute('data-id', data.id);
        container.setAttribute('data-value', data.value);

        // Add content
        container.innerHTML = `${flagIcon} ${data.label}`;
        return container;
      },
      choice: (classNames, data) => {
        const flagIcon = data.customProperties?.flag
          ? `<img class="flag-icon" src="flags/${data.customProperties.flag}.png" alt="${data.label}" />`
          : '';

        const container = document.createElement('div');
        container.className = `${classNames.item} ${classNames.itemChoice}`;
        container.setAttribute('data-choice', '');
        container.setAttribute('data-id', data.id);
        container.setAttribute('data-value', data.value);
        container.setAttribute('role', data.groupId > 0 ? 'treeitem' : 'option');
        container.innerHTML = `${flagIcon} ${data.label}`;
        return container;
      },
    };
  },
});

// Fill in country options
Object.entries(countryCityData).forEach(([code, { name, flag }]) => {
  countryChoices.setChoices([
    {
      value: code,
      label: name,
      customProperties: { flag }, // Make sure flag exists
    },
  ]);
});

// Variable to store the city's Choices object
let cityChoices = new Choices(citySelect, {
  allowHTML: true,
});

// Handling country selection
countrySelect.addEventListener("change", () => {
  const selectedCode = countrySelect.value;
  const cities = countryCityData[selectedCode]?.cities || [];

  // Update city options
  citySelect.innerHTML = "";
  cities.forEach((city) => {
    const option = document.createElement("option");
    option.value = city;
    option.textContent = city;
    citySelect.appendChild(option);
  });

  // Destroy Previous initialization and reinitialization
  if (cityChoices) {
    cityChoices.destroy(); // Destroy current initialization
  }
  cityChoices = new Choices(citySelect, { allowHTML: true }); // Reinitialization
  citySelect.disabled = cities.length === 0; // Disable the list if there are no cities
});
5. Run the project
After writing the code, run the project using the command:
npm run dev
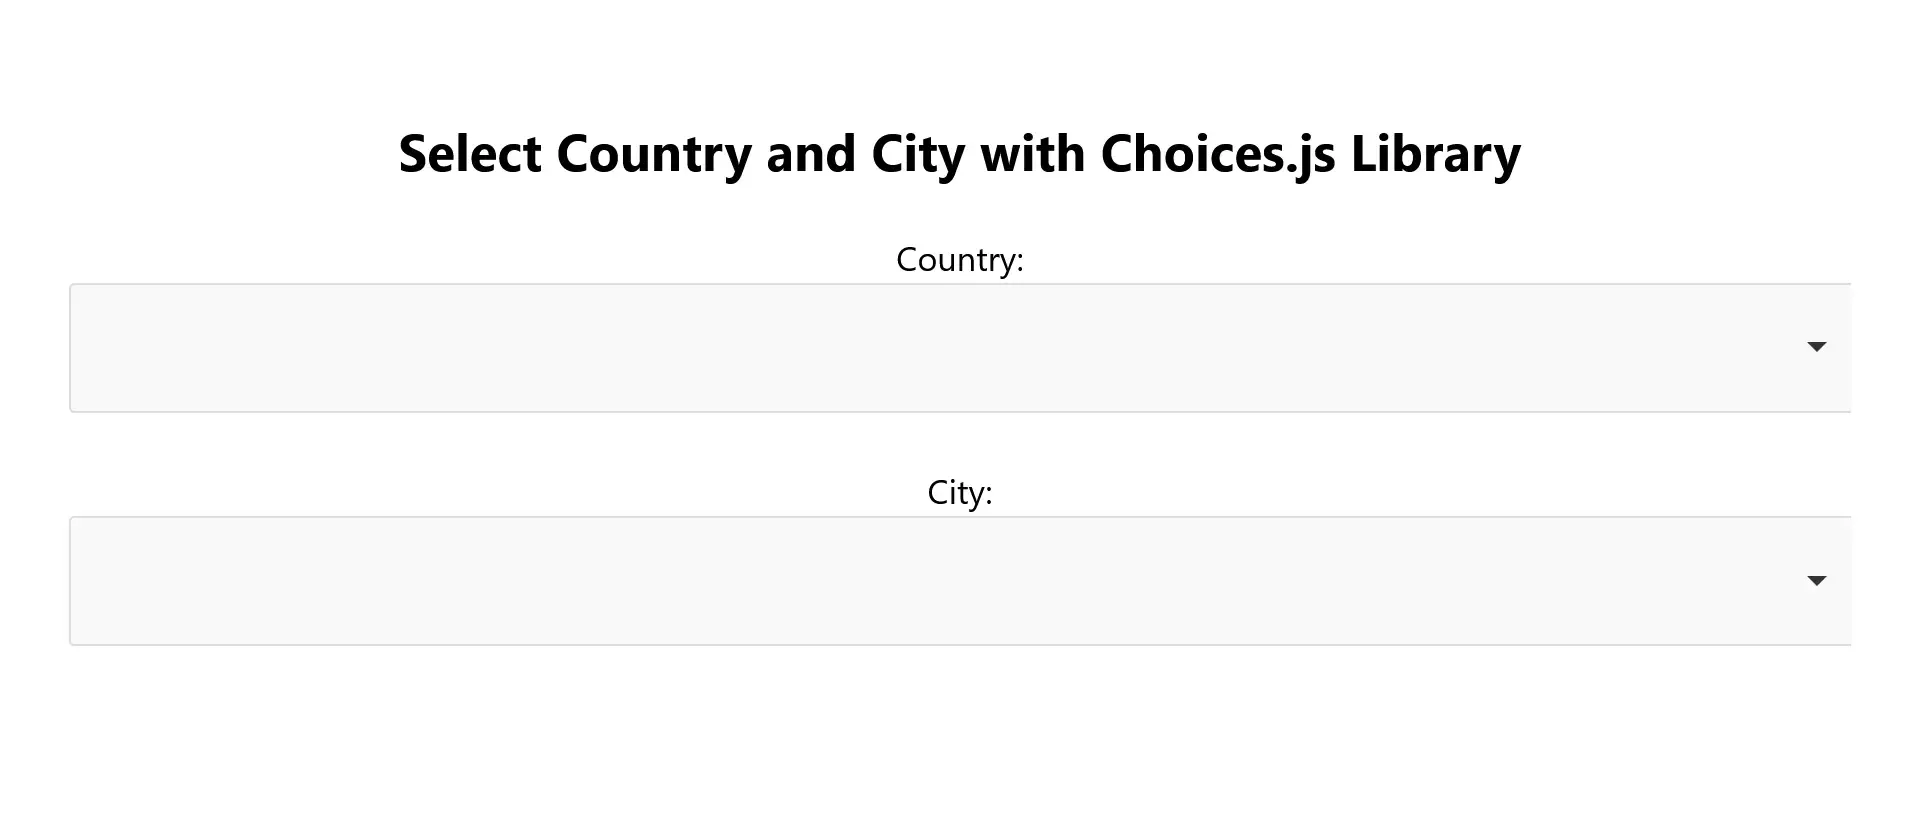
- You will see the interface appear in the browser with dynamic selection lists.
- The project will run in the browser on the local link provided by Vite.
- Open the following link
http://localhost:5173/in the browser and you will find the following.
Advantages of this method
- Ready-made library: Using the
Choices.jslibrary provides advanced features such as searching within lists. - Flexibility in design: The design can be easily customized using CSS.
- Data dynamics: Local data can be replaced with an API to update countries and cities in real time.
Of course! We can create the project using another method based on the Select2 library, which is a flexible and easy-to-use JavaScript library for customizing choice lists, with support for advanced features such as searching and displaying flag images within the list.
Creating a country and city selection project using Vite and Select2
In this method, we will use the Select2 library to design a country and city selection list with flags added next to the country names.
Prerequisites
- Node.js installed on your device.
- Basic knowledge of HTML, CSS, and JavaScript.
1. Setting up a Vite project
Start by creating a new project with Vite:
npm create vite@latest vite-select2-country-city --template vanilla
cd vite-select2-country-city
npm install
Install the Select2 library and the jQuery library:
npm install jquery select2
2. Edit the HTML structure
Update the index.html file to include the required fields:
<!DOCTYPE html>
<html lang="en">
<head>
  <meta charset="UTF-8">
  <meta name="viewport" content="width=device-width, initial-scale=1.0">
  <title>Select Country and City</title>
  <link rel="stylesheet" href="/src/style.css">
</head>
<body>
  <div id="app">
    <h2>Select Country and City with Select2 Library</h2>

    <label for="country">Country:</label>
    <select id="country" style="width: 100%"></select>

    <label for="city">City:</label>
    <select id="city" style="width: 100%;"></select>
  </div>

  <script type="module" src="/src/main.js"></script>
</body>
</html>
3. CSS Design Code
In the next step, we will edit the style.css file in the src folder of the project. This file contains the code needed to add some aesthetic touches to the page.
:root {
  font-family: Inter, system-ui, Avenir, Helvetica, Arial, sans-serif;
  line-height: 1.5;
  font-weight: 400;

  font-synthesis: none;
  text-rendering: optimizeLegibility;
  -webkit-font-smoothing: antialiased;
  -moz-osx-font-smoothing: grayscale;
}

body {
  margin: 0;
  min-width: 320px;
  min-height: 100vh;
  text-align: center;
}

#app {
  max-width: 1280px;
  margin: 0 auto;
  padding: 2rem;
}

.flag-icon {
  width: 20px;
  height: 15px;
  margin-right: 10px;
  vertical-align: middle;
}
4. Write the code
Add the following code in the main.js file:
Define the data of countries and cities
// Country and city data
const countryCityData = {
  EG: { name: "Egypt", flag: "eg", cities: ["Cairo", "Giza", "Alexandria"] },
  US: { name: "United States", flag: "us", cities: ["New York", "Los Angeles", "Chicago"] },
  IN: { name: "India", flag: "in", cities: ["Delhi", "Mumbai", "Bangalore"] },
  DE: { name: "Germany", flag: "de", cities: ["Berlin", "Munich", "Frankfurt"] },
};
Setting up Select2 Library
import $ from "jquery";
import select2 from "select2";

import "select2/dist/css/select2.min.css"; // Import Select2's CSS
select2($); // Force Select2 to work with jQuery

$(document).ready(() => {
  // Fill Country List
  const countryOptions = Object.entries(countryCityData).map(([code, { name, flag }]) => ({
    id: code,
    text: `<img class="flag-icon" src="flags/${flag}.png" style="width: 20px; height: 15px; margin-right: 5px;" /> ${name}`,
  }));

  $("#country").select2({
    data: countryOptions,
    escapeMarkup: (markup) => markup, // to allow flag images to be displayed
    placeholder: "Select Country",
  });

  // Initialize the city list
  $("#city").select2({
    placeholder: "Select City",
    disabled: true, // initially disabled
  });

  // Handling country selection
  $("#country").on("change", function () {
    const selectedCode = $(this).val();
    const selectedCountry = countryCityData[selectedCode];

    // Update the list of cities
    if (selectedCountry) {
      const cityOptions = selectedCountry.cities.map((city) => ({ id: city, text: city }));
      $("#city").empty(); // Empty the previous options
      cityOptions.forEach((option) => {
        const newOption = new Option(option.text, option.id, false, false);
        $("#city").append(newOption);
      });
      $("#city").prop("disabled", false).trigger("change");
    } else {
      $("#city").empty().prop("disabled", true).trigger("change");
    }
  });
});
5. Run the project
To run the project, use the command:
npm run dev
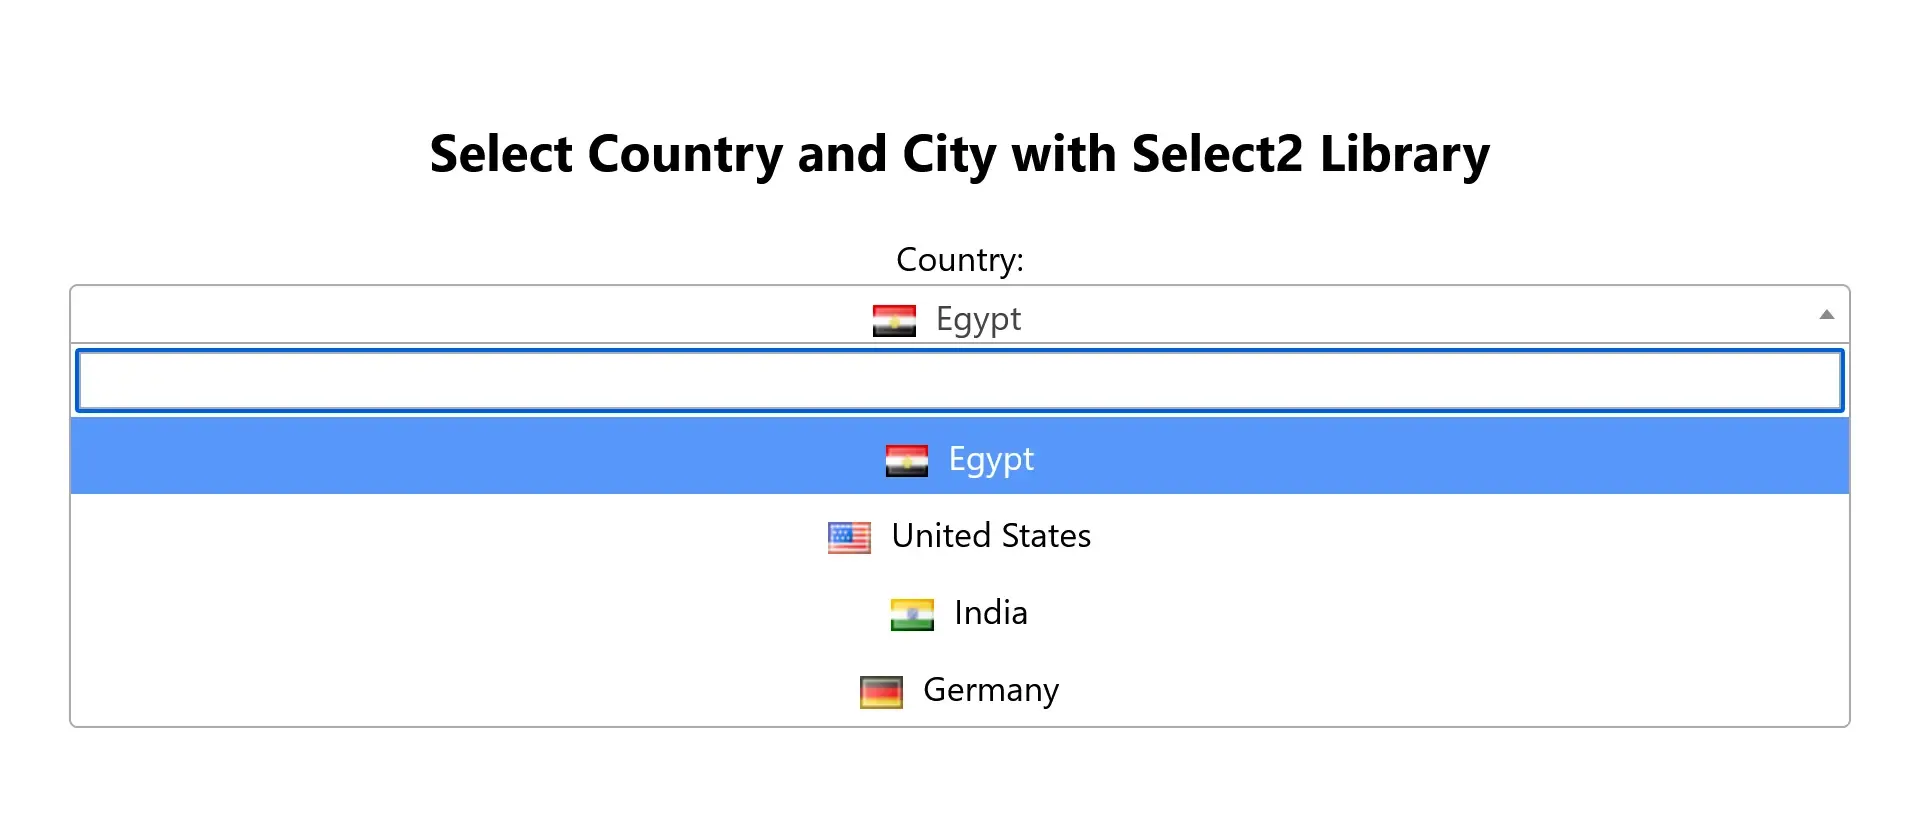
- Then open the project in the browser. You will see a professional interface containing a list of countries with flag images next to them.
- The project will run in the browser on the local link provided by Vite.
- Open the following link
http://localhost:5173/in the browser and you will find the following.
Features using Select2
- Search support: You can search within lists easily.
- Show images: You can add flag images next to country names.
- Easy customization: You can customize the appearance using CSS.
- Integration with jQuery library: Makes working with DOM easier.
Yes, there is another way that depends on creating a list of countries and cities using an API such as REST Countries to get data on countries and flags, and merging it with the dynamic data of the project. This method makes the project more flexible and automatically updateable without the need to manage data manually.
Create a project using REST API and Select2
1. Project idea
- Using the API to get a list of countries and flags.
- Using the Select2 library.
- Displaying flags next to country names.
- When selecting a country, a list of cities associated with it is displayed.
2. Project Setup
Create a new Vite project:
npm create vite@latest vite-country-city-api --template vanilla
cd vite-country-city-api
npm install
Install Select2 and jQuery libraries:
npm install jquery select2
3. Edit the index.html file
Add the required fields for interaction:
<!DOCTYPE html>
<html lang="en">
  <head>
    <meta charset="UTF-8" />
    <meta name="viewport" content="width=device-width, initial-scale=1.0" />
    <title>Select Country and City</title>
    <link rel="stylesheet" href="/src/style.css" />
  </head>
  <body>
    <div id="app">
      <h2>Select Country and City with REST API and Select2</h2>
      <label for="country">Country:</label>
      <select id="country">
        <option value="" disabled selected>Select Country</option>
      </select>

      <label for="city">City:</label>
      <select id="city" disabled>
        <option value="" disabled selected>Select City</option>
      </select>
    </div>

    <script type="module" src="/src/main.js"></script>
  </body>
</html>
4. CSS Design Code
In the next step, we will edit the style.css file in the src folder of the project. This file contains the code needed to add some aesthetic touches to the page.
:root {
  font-family: Inter, system-ui, Avenir, Helvetica, Arial, sans-serif;
  line-height: 1.5;
  font-weight: 400;

  font-synthesis: none;
  text-rendering: optimizeLegibility;
  -webkit-font-smoothing: antialiased;
  -moz-osx-font-smoothing: grayscale;
}

body {
  margin: 0;
  min-width: 320px;
  min-height: 100vh;
  text-align: center;
}

#app {
  max-width: 1280px;
  margin: 0 auto;
  padding: 2rem;
}

.flag-icon {
  width: 20px;
  height: 15px;
  margin-right: 10px;
  vertical-align: middle;
}

select {
  width: 100%;
  padding: 10px;
  margin: 10px 0;
}
5. Write the code in main.js
Get country data from API
import $ from "jquery";
import select2 from "select2";
import "select2/dist/css/select2.min.css"; // Import Select2's CSS

select2($); // Force Select2 to work with jQuery

const countrySelect = document.getElementById("country");
const citySelect = document.getElementById("city");

// Cities data (optional)
const countryCityData = {
  EG: { name: "Egypt", flag: "eg", cities: ["Cairo", "Giza", "Alexandria"] },
  US: { name: "United States", flag: "us", cities: ["New York", "Los Angeles", "Chicago"] },
  IN: { name: "India", flag: "in", cities: ["Delhi", "Mumbai", "Bangalore"] },
  DE: { name: "Germany", flag: "de", cities: ["Berlin", "Munich", "Frankfurt"] },
};

// Load countries from API
async function loadCountries() {
  const response = await fetch("https://restcountries.com/v3.1/all");
  const countries = await response.json();

  const countryOptions = countries.map((country) => {
    const flag = country.flags.svg || country.flags.png; // Flag link

    const name = country.translations.ar?.common || country.name.common; // Country name
    return {
      id: country.cca2, // Country code
      text: `<img class="flag-icon" src="${flag}" style= "width: 20px; height: 15px; margin-right: 5px;" /> ${name}`,
    };
  });

  // Initialize Select2 with countries
  $("#country").select2({
    data: countryOptions,
    escapeMarkup: (markup) => markup, // Allow flags to be displayed as HTML
    placeholder: "Select Country",
  });
}

// When selecting the country
$("#country").on("change", function () {
  const selectedCode = $(this).val();
  const selectedCountry = countryCityData[selectedCode];

  // Update the list of cities
  if (selectedCountry) {
    const cityOptions = selectedCountry.cities.map((city) => ({
      id: city,
      text: city,
    }));

    $("#city").empty(); // Empty old options
    cityOptions.forEach((option) => {
      const newOption = new Option(option.text, option.id, false, false);
      $("#city").append(newOption);
    });

    $("#city").prop("disabled", false).trigger("change");
  } else {
    $("#city").empty().prop("disabled", true).trigger("change");
  }
});

// Initialize the list of cities
$("#city").select2({
  placeholder: "Select City",
  disabled: true, // initially disabled
});

// Call function to load countries from API
$(document).ready(() => {
  loadCountries();
});
6. Run the project
To run the project, use the command:
npm run dev
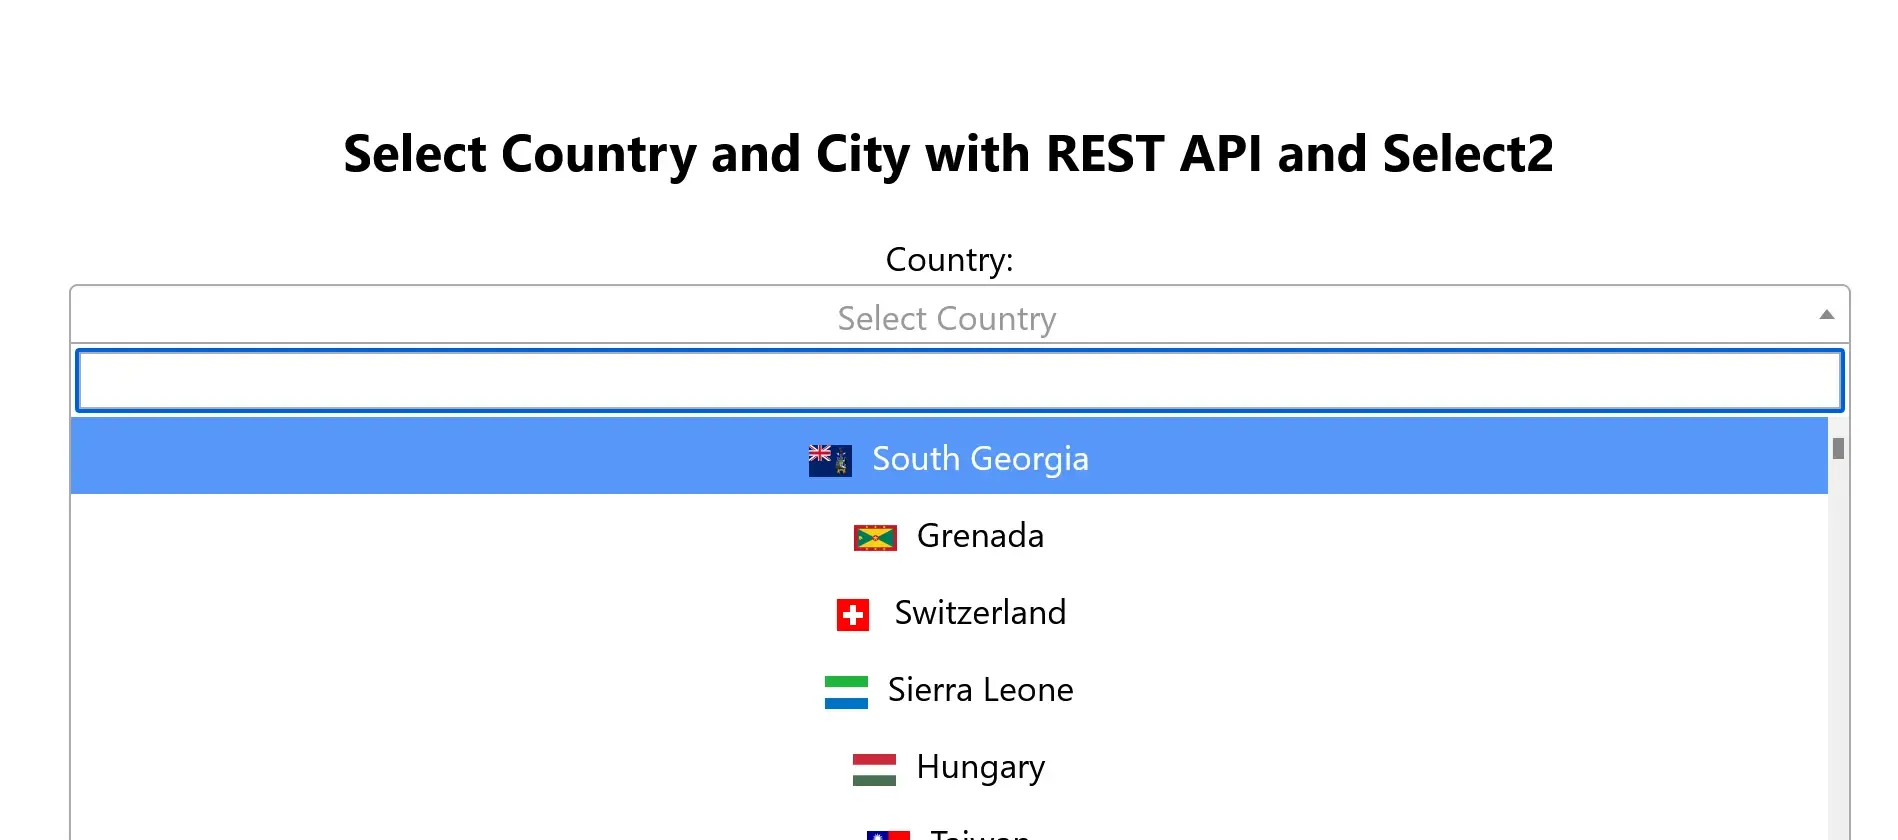
- Then open the project in the browser. You will see a professional interface containing a list of countries with flag images next to them.
- The project will run in the browser on the local link provided by Vite.
- Open the following link
http://localhost:5173/in the browser and you will find the following.
Advantages of this method
- Dynamic data support:
- Country data is loaded directly from the REST API.
- The project is automatically updated if data changes in the API.
- Easy to add cities:
- City data can be stored locally or additional APIs can be used.
- Advantages using Select2
- Search support: Lists can be searched easily.
- Show images: Flag images can be added next to country names.
- Easy to customize: The appearance can be customized using CSS.
- Integration with jQuery library: Makes working with the DOM easier.
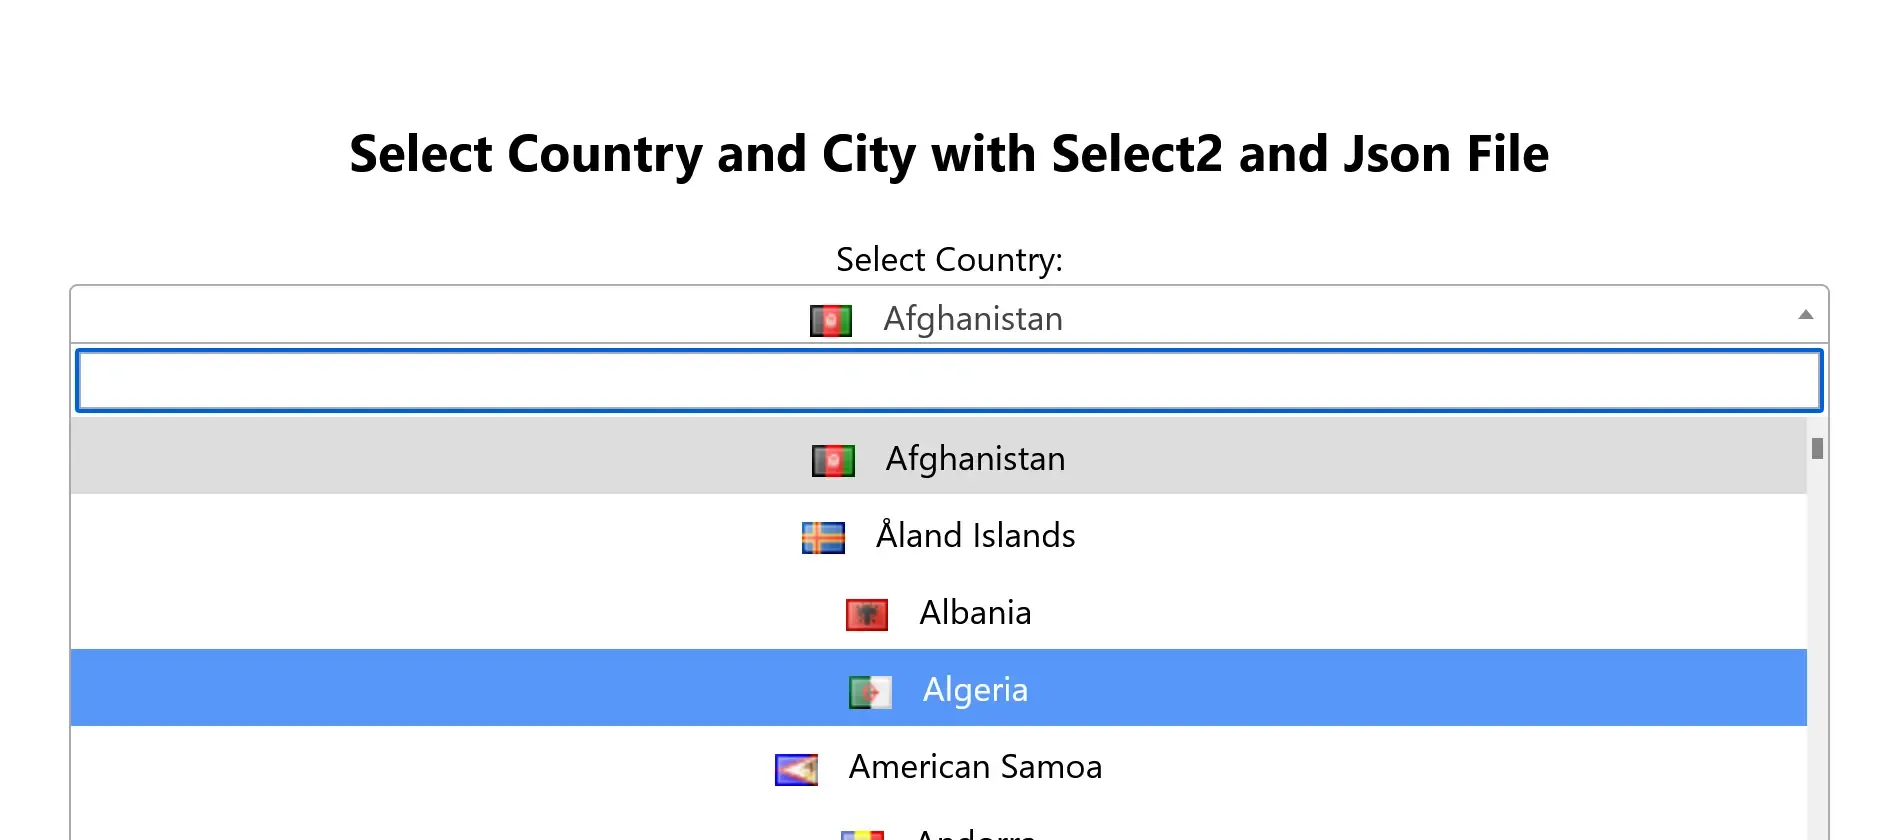
Create a dynamic list of countries and cities using the Select2 library and a local JSON file
In this example, we will cover how to use the Select2 library to create a dynamic dropdown list to display countries and cities. We will use a local JSON file containing all countries and cities, and we will explain how to import the data and link it to the dropdown lists.
Step 1: Setting up the project
1. Install Select2:
Make sure you have installed Select2 and jQuery using npm:
npm install jquery select2
2. Prepare a JSON file:
Make sure you have a file containing the data for countries and cities. Let's say the file is called countries.js and follows the following format:
export default [
  {
    countryName: "Afghanistan",
    countryShortCode: "AF",
    regions: [
      { name: "Badakhshan", shortCode: "BDS" },
      { name: "Kabul", shortCode: "KBL" },
    ],
  },
  {
    countryName: "India",
    countryShortCode: "IN",
    regions: [
      { name: "Delhi", shortCode: "DL" },
      { name: "Mumbai", shortCode: "MH" },
    ],
  },
];
Step 2: Structuring the HTML
Create a simple structure containing two dropdown lists:
<!DOCTYPE html>
<html lang="en">
  <head>
    <meta charset="UTF-8" />
    <meta name="viewport" content="width=device-width, initial-scale=1.0" />
    <title>Select Country and City</title>
    <link rel="stylesheet" href="/src/style.css" />
  </head>
  <body>
    <div id="app">
      <h1>Select Country and City</h1>
      <div>
        <label for="country">Select Country:</label>
        <select id="country" style="width: 100%"></select>
      </div>
      <div>
        <label for="city">Select City:</label>
        <select id="city" style="width: 100%" disabled></select>
      </div>
    </div>

    <script type="module" src="/src/main.js"></script>
  </body>
</html>
Step 3: Load Data and Configure Lists
1. Import Libraries and Data:
Import the Select2 library and JSON file:
import $ from "jquery";
import select2 from "select2";
import "select2/dist/css/select2.min.css";
import countries from "./countries.js";

select2($)
2. Configure the dropdown list for countries:
- Use the country data to create options for the dropdown list:
function populateCountries() {
  const countryOptions = countries.map((country) => ({
    id: country.countryShortCode,
    text: `
        <span class="flag-container">
          <img class="flag-icon" src="flags/${country.countryShortCode.toLowerCase()}.png" alt="${country.countryName}" />
        </span>
        ${country.countryName}
      `,
  }));

  $("#country").select2({
    data: countryOptions,
    escapeMarkup: (markup) => markup, // للسماح بعرض الأعلام
    placeholder: "اختر الدولة",
  });
}
3. Link cities to the selected country:
- When selecting a country, the list of cities is updated:
$("#country").on("change", function () {
  const selectedCode = $(this).val();
  const selectedCountry = countries.find(
    (country) => country.countryShortCode === selectedCode
  );

  if (selectedCountry && selectedCountry.regions) {
    const cityOptions = selectedCountry.regions.map((region) => ({
      id: region.shortCode,
      text: region.name,
    }));

    $("#city")
      .prop("disabled", false)
      .empty()
      .select2({
        data: cityOptions,
        placeholder: "Select City",
      });
  } else {
    $("#city").prop("disabled", true).empty().select2({ data: [] });
  }
});
4. Setting up the cities list at the beginning of the page:
- Disable the cities list by default:
$("#city").select2({
  placeholder: "Select City",
});
5. Calling the countries initialization:
- Calling the function when the page loads:
$(document).ready(() => {
  populateCountries();
});
Step 4: Formatting the list
Number then formatting the list as beautiful:
:root {
  font-family: Inter, system-ui, Avenir, Helvetica, Arial, sans-serif;
  line-height: 1.5;
  font-weight: 400;

  font-synthesis: none;
  text-rendering: optimizeLegibility;
  -webkit-font-smoothing: antialiased;
  -moz-osx-font-smoothing: grayscale;
}

body {
  margin: 0;
  min-width: 320px;
  min-height: 100vh;
  text-align: center;
}

h1 {
  font-size: 3.2em;
  line-height: 1.1;
}

#app {
  max-width: 1280px;
  margin: 0 auto;
  padding: 2rem;
}

.flag-icon {
  width: 20px;
  height: 15px;
  margin-right: 10px;
  vertical-align: middle;
}

select {
  width: 100%;
}
Project Result
- When the page loads, all countries are displayed in the first dropdown list.
- When a country is selected, the second list is filled with the cities of that country.
- The list of cities is disabled if no country is selected.
Conclusion:
Choosing the right method to create a country and city selection project depends on your technical requirements and project needs. Whether you prefer the simplicity of not using external libraries, or you want to take advantage of the features of tools like Select2 and Choices.js, the options are many. Try different methods and choose the best one for your project to ensure a smooth and distinctive user experience.
Find all the examples ready and hosted on the GitHub repository.
